The initial drawing of the outline is very manageable. But once it comes to filling in the details, just somehow can’t get it right. Need to do more practise.
Mark, you are right about practice – that’s key. But perhaps there are a couple of other ways I can suggest to avoid getting overwhelmed by details.
A really simple one I have mentioned already. With field-sketching, bigger is better!
A field-sketch of a probable Puffin! But with a sketch this small, the slightest slip of the pencil can make a huge difference, and it’s hard to add any details. Later, I learned to sketch BIGGER!
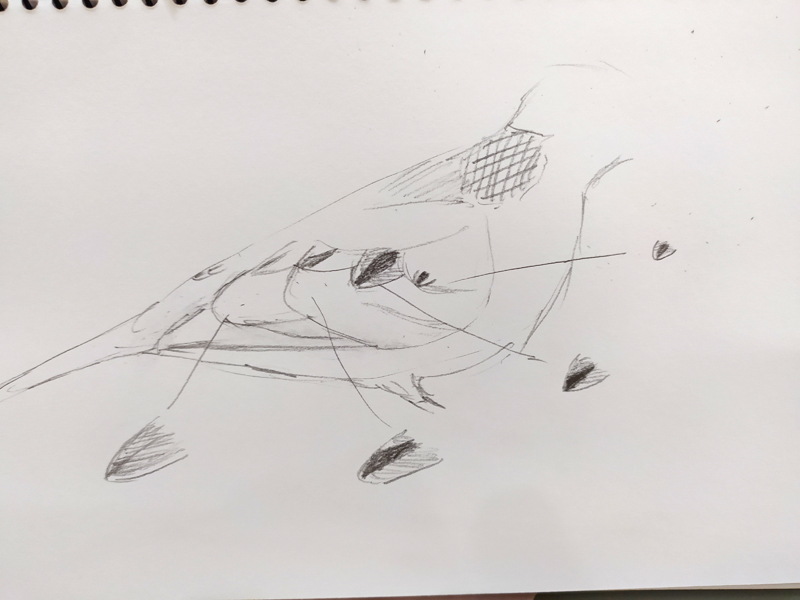
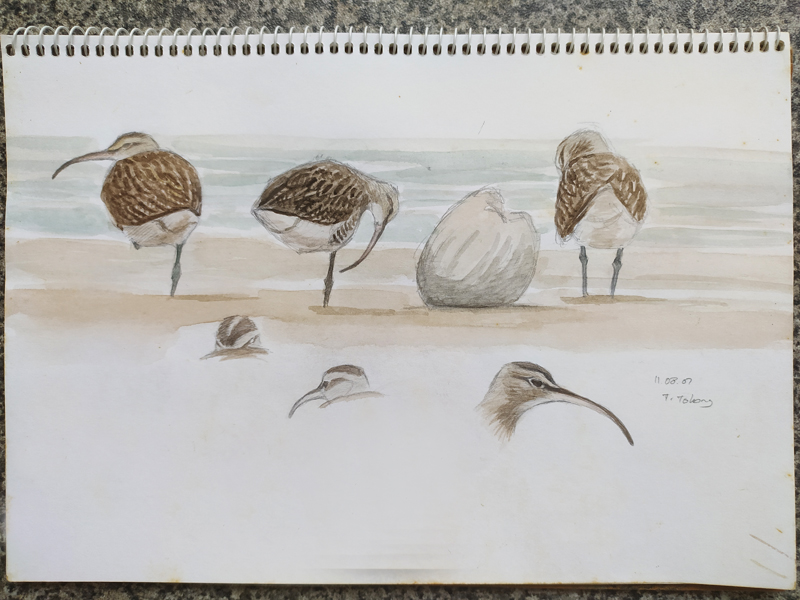
2. If patterns on feather tracts are complex, just focus on a feather! Field-sketching is always a trade-off between accuracy and speed. You have to be fast because you don’t know how much longer the bird will pose for you. But you need details as well. This is where a knowledge of feather tracts comes in useful. Rather than sketch the whole wing, just draw one greater covert, one median covert, etc (assuming they are all similar patterned).
But when the bird turns sideways, the amount of ‘information’ on the wing can be overwhelming. What I try to do, if I have time, is to sketch one feather from each of the relevant feather tracts. Then, once the bird flies away, at least I have some basic information to fill in the gaps.
3. Sketch the same species more than once. The more familiar you become with the patterns on a particular species, the easier it will be to take in details.
4. Don’t feel the need to sketch the whole bird. Try concentrating on the parts that you can see. I find it helpful to have several sketches “on the go” simultaneously. As the bird shifts position, you can keep adding information to your sketches.
You can maximise your time by having several sketches in process. Don’t worry if you cannot finish all of them.Drawing the head at several angles means you can keep adding bits as a bird shifts position.
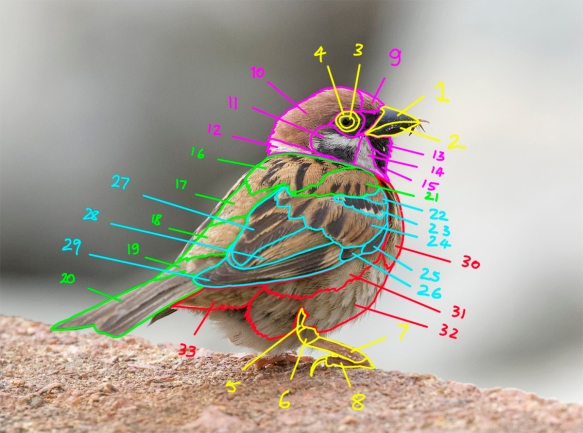
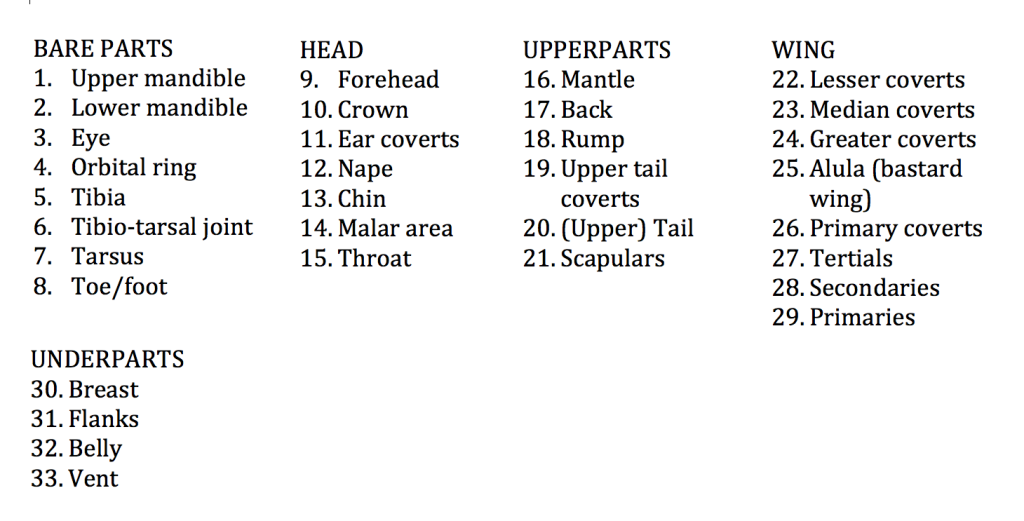
Well done to Michelle for having a go at this (on Facebook). For you, and anyone else who had a try, here are the answers:
For some reason, there is quite a bit of resistance from some folks when they are confronted with a list of terms like this. But really? Many of them are common sense and in general use already. It’s not that much to learn and doesn’t require a great deal of effort. Soon they will become second nature, and I guarantee you they will help you get a lot more out of your hobby and become a better birder.
Now, back to sketching. Later, we will explore other ways to take notes which don’t involve sketching, but for now, I want to encourage you to give sketching a go. As I said in an earlier post, most people can, they just don’t.
If you’ve ever attended any kind of birding for beginners course, you’re probably already familiar with the “egg method”. But, for those who are not…
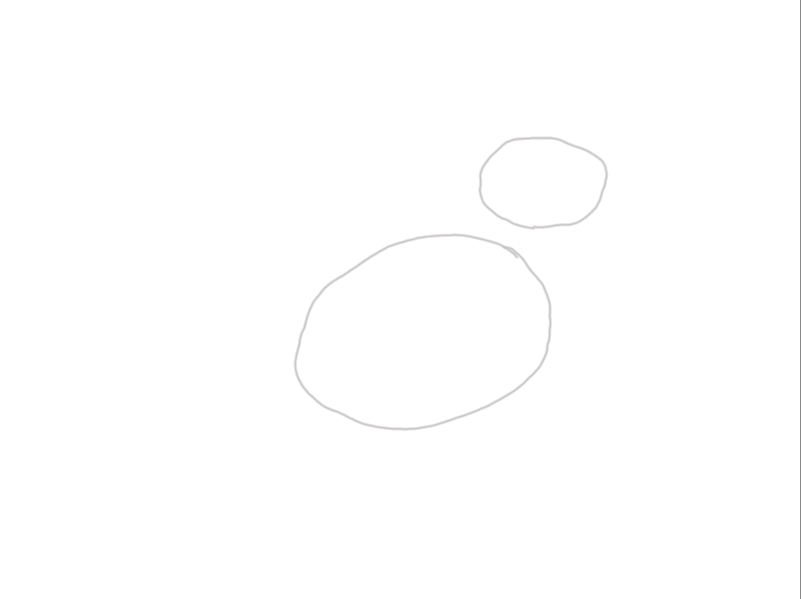
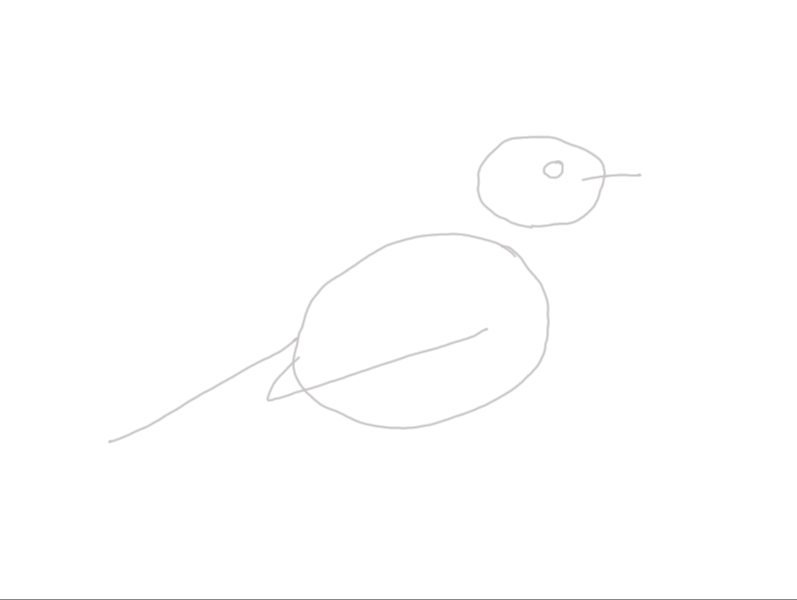
Draw an egg – fairly large and somewhat centrally on your paper:
2. Draw a smaller egg where the head is:
3. Add lines for for the bill, wings and tail, (paying attention to length and shape) and an eye:
4. Join the head and body and add legs:
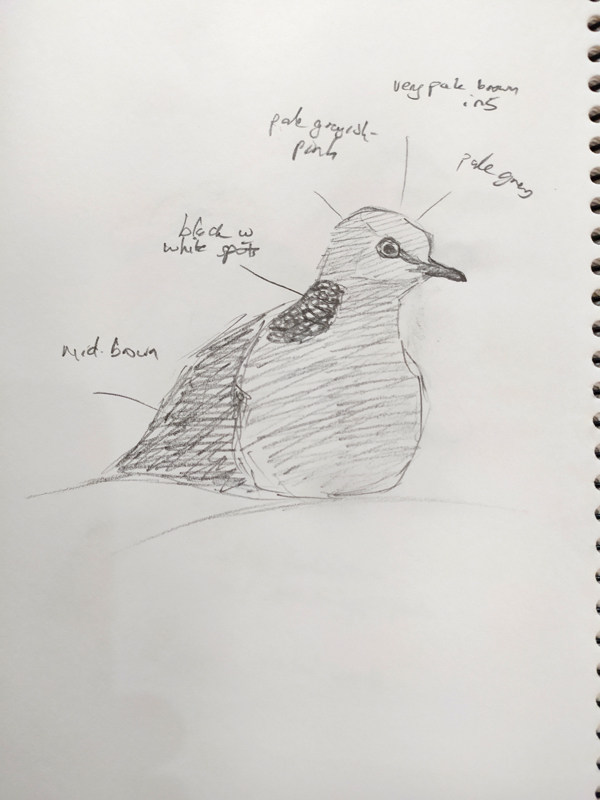
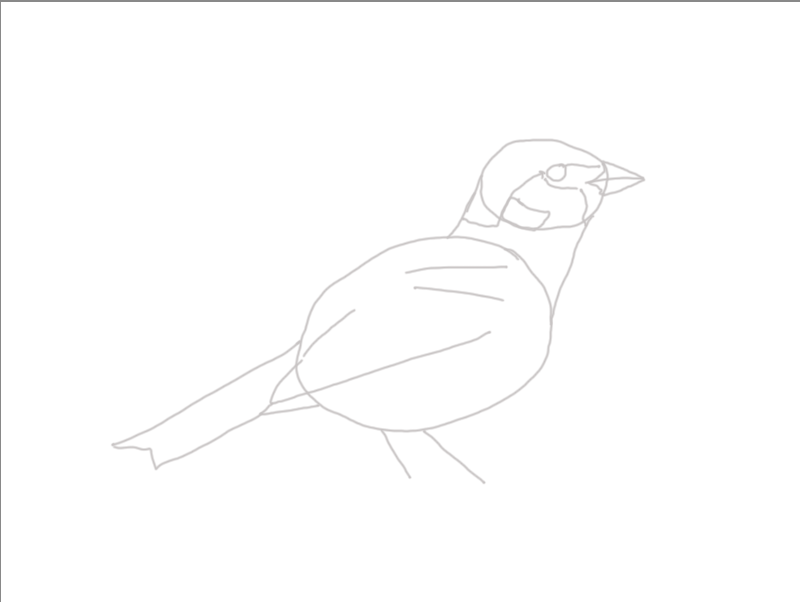
Gradually fill in the details, focusing on whichever part of the bird is visible. For example, if the bird turns its head away, work on the body till the head turns back. I find it helps to put a few lines in to indicate the position of different feather tracts.
Complete as much of your sketch as you can while actually watching the bird. If it moves out of view, quickly add in whatever details you can remember. Leave blank anything you are not sure of. You can add notes about size, shape, calls, behaviour, etc.
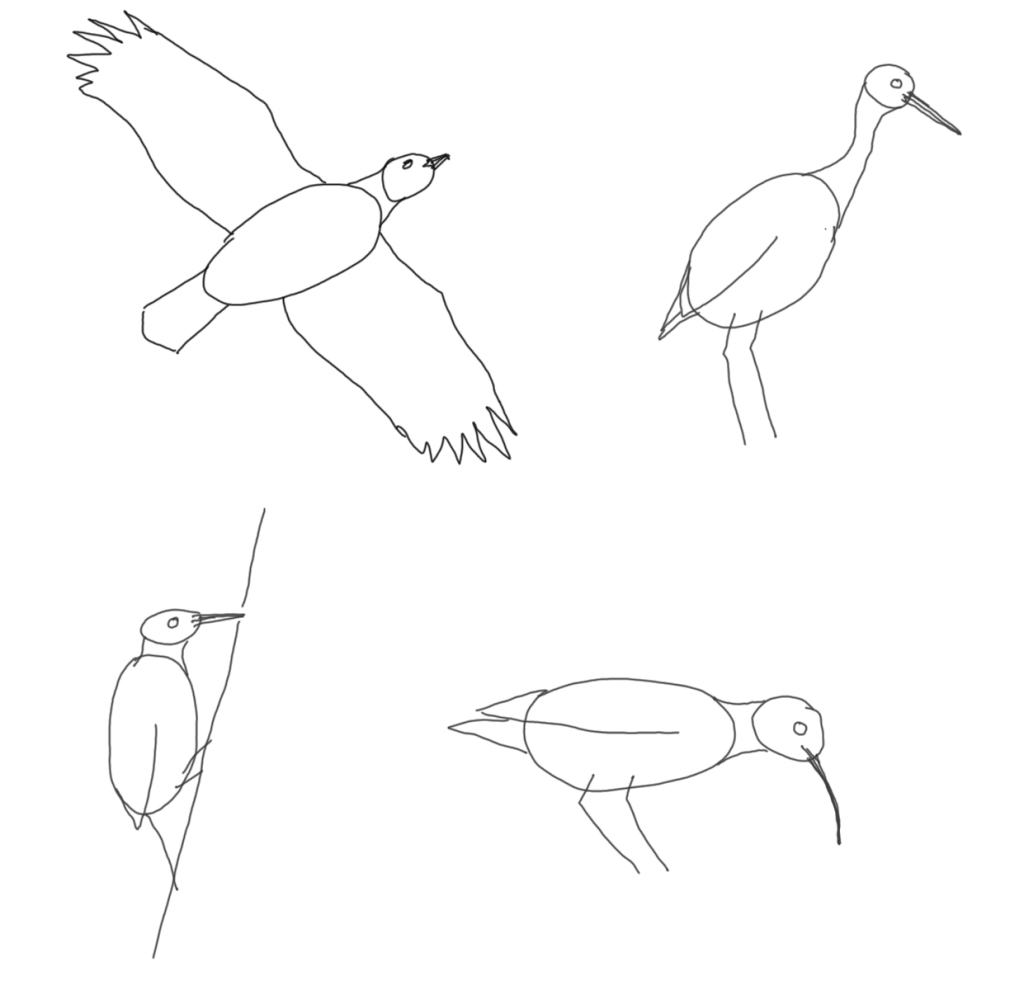
By varying the proportions of your drawing, you can draw many different types of birds:
A flying raptor, an egret, heron or stork, a woodpecker and a shorebird/wader.
To give you an idea of how this works in real life, click on this video.
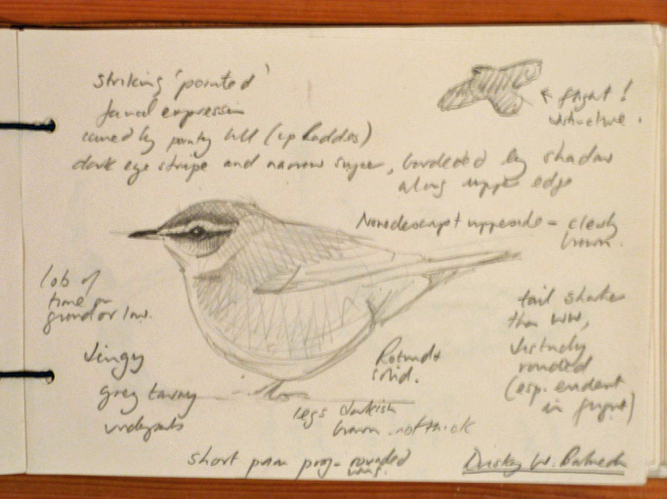
I hope this post gives you some idea of how to get started. Before too long, you’ll probably be able to dispense with the eggs. If you keep at it, you will find that not only are your sketching skills improving, but more importantly, your observational skills will become sharper. You’ll find it easier to identify the commoner birds and you’ll be quicker to spot something which isn’t quite as common. Here are few examples to whet your appetite!
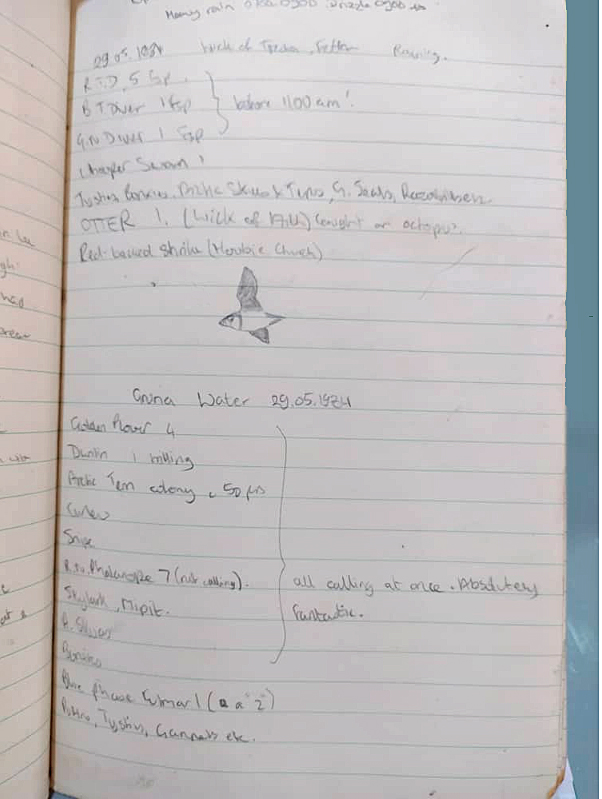
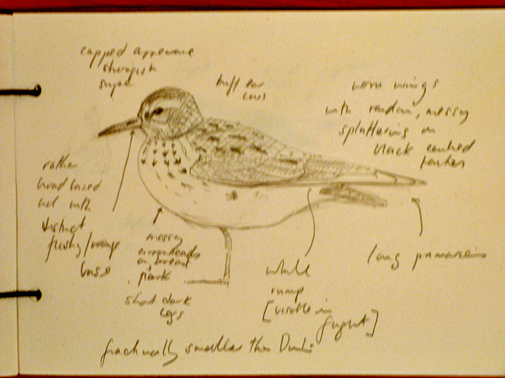
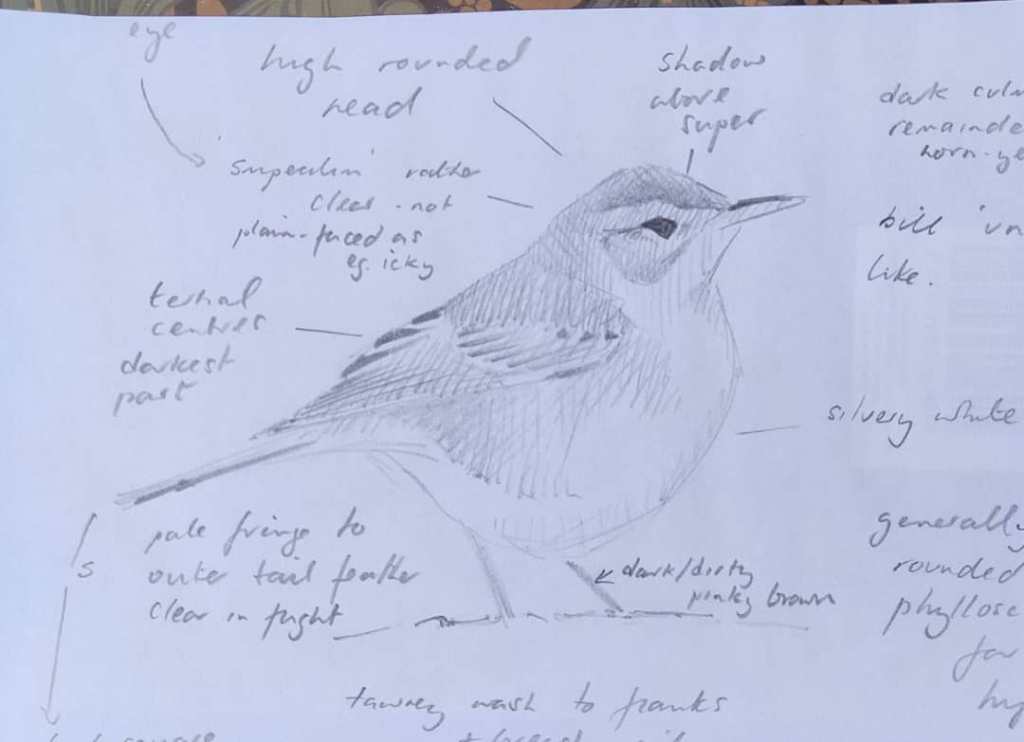
Field notes on a Dusky Warbler. Chris GibbinsField notes on a White-rumped Sandpiper. Chris Gibbins.
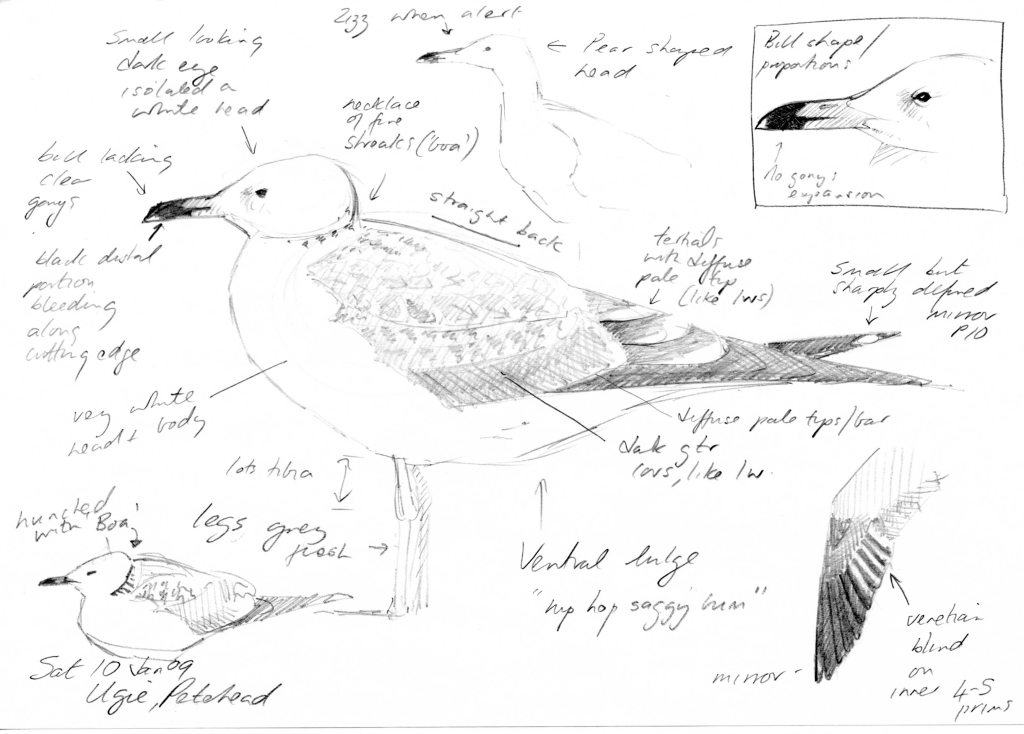
Field notes on a Caspian Gull. Chris Gibbins.Field notes on a Booted Warbler. Chris Gibbins.
As you can see, Chris doesn’t actually need to draw the eggs any more, but you can still see the egg shapes in his drawings. The skill of field-sketching is a basic building block that will develop you from someone who just looks at birds, to someone who really knows their birds. Start today, and keep, at it!
Thanks for all the great feedback on the “exercises” I set in the previous two posts (both in the comments section below and via Facebook). Being willing to share your efforts with the world can be a scary thing – so I take my hat off to each of you!
Which brings me to an important point. It is very difficult (perhaps impossible?) to avoid comparing oneself to others. Many of us look enviously at the accomplished drawings of others, conclude that “I could never be that good” and give up, or at least be tempted to do so. But taking field notes is emphatically not the same as making art! The point is not to end up with a beautiful final product, but to learn through the process of disciplining yourself to describe what you see.
For example, I bet that every one of you who attempted the exercise of making field notes on the Eurasian Tree Sparrow in the previous post, no matter how “bad” your final effort was, now know what colour its legs are. Or whether its underparts are white, grey or brown. Or whether it has one wing bar or two. And I also bet that very few of you could have remembered those points before doing the exercise.
The reason is simple. Expression improves impression. The process of receiving information via your eyes or ears to your brain, and then retrieving and translating that information from your brain through your fingers or mouth to a page of a notebook or a recording device deepens the impression it leaves in your long-term memory. The key is that is a conscious cognitive process of seeing, noticing, articulating.
‘Before’ sketch from memory; ‘After’ sketch with reference to photos and videos. Kang Woei Ong.
Here’s an example. Woei Ong is a very accomplished young artist who has trained himself to notice details through the discipline of regular sketching (so DON’T COMPARE!). His sketch from memory has an amazing amount of detail (much more that mine). Even so, there are significant ‘gaps’ where even his memory failed him (e.g. around the eye, the underparts, the wings). Now, as a result of having made notes from a “field observation” (online!), his memory of what a Tree Sparrow looks like will have improved markedly.
Making a sketch is probably the most time-efficient way of making notes. Even if it’s a really bad sketch, as long as it’s honest (ie you don’t try to “fill in” bits after the bird has flown and you have forgotten what you saw), it will likely store and convey more information than written notes alone.
At this point I can hear a chorus of “But I can’t draw!” What I understand from that is “I don’t draw.” It’s like when I say, “I can’t cook”. What it really means is “I don’t cook”. True, you may not be the world’s greatest artist, but even the world’s greatest artist was not the world’s greatest artist when they started.
Can’t see any date, but I was probably about 16 years old when I did these field sketches. These are quite basic, and I include them as an encouragement to those of you who say “I can’t draw!”
I said in a previous post that I am not advocating going back to carrying a notebook and pencil around every time we go birding. I’d be a hypocrite to say that, as I don’t! But, I do think it is a very useful to sometimes put the camera down and concentrate on observing a bird, trying to notice and describe what you see. It will not only help you get to know that particular species better, it will improve your observational skills in general.
Chris Gibbins and I were discussing this topic recently and he made an astute analogy (as a professor in a leading UK university, he is well qualified to make it). He said “Some students seem to want to get the degree without doing the work. And it’s difficult to conceive a way of doing that without devaluing the degree. In the same way, it’s difficult to conceive of a way for people to become really proficient at identifying birds without doing the hard work of taking field notes. You can’t have the end-product without the hard work.”
Looking back over almost 50 years of birding and being around birders, I’ve been fortunate to meet many really ‘expert’ birders. I can’t think of a single one who didn’t at some point in their development as a birder make a regular practice of taking field notes. Unfortunately, the opposite is also true. I have met and still meet people who have been birding for many decades and still make elementary errors in identification, because they have never trained themselves in this way. Everyone makes mistakes, of course, but I’m talking about people who consistently misidentify birds which, quite honestly, they should know, after all their years of experience. You can’t get the degree without doing the work.
This time of enforced ‘backyard birding’ might be the ideal time to start (or to restart!) trying to take field notes. After all, there’s a limit to how many photos you want to take of bulbuls and sparrows, etc, isn’t there? So, this post’s challenge for you is to take some time in the next few days to sit down in the backyard with a pen or pencil and a piece of paper or sketch book (hint – the bigger the better – most people make the mistake of making sketches which are far too small) and your binoculars (or just bare eyes) and try to make some notes and sketches of one or more birds. Don’t forget to include aspects such as their behaviour, the sounds they make, their habitat, etc.
Feel free to share what you learned through the process.